
a) Intro
Tactics without strategy is blind, strategy without tactics is unfruitful. Tactical and strategic parts of the game are deeply intertwined and inseparable from each other. They are like two sides of a medaillon. If focused only on one of them, the development of a player will be eventually limited. As we have seen lots of tactics in the previous section, now it is time for us to explore more strategic sides of the game.
It is probably safe to claim that there are not many studies done in exploring and establishing a general strategy and opening theory for Dobutsu Shogi. In fact, I have not seen or encountered any studies yet, so at least for me it is still in its infancy and unknown territory. All the content i’ll share in this section about Strategy and Opening Theory is the result of my own studies and there is certainly room for improvement.
Exploring and discovering strategic principles in Dobutsu Shogi is definitely harder than studying tactics. Main reason for that is that it is a very concrete game full of constant action in close combat. There is little time for slow-strategic long term plans. Structures are very dynamic and changing at the speed of light. Pieces comes back to the board anytime and nothing stays stable. Therefore it is hard to speak of “Chick Structures” like “Pawn Structures in Chess”, as things change so quickly. Still there is a room for exploring some general recurring themes that might be helpful to keep in mind and orientate oneself when there is no immediate tactical blow.
Piece values set the base for a strategic evaluation or with other words they are the starting point. But only a starting point. Strategic evaluation and assessment of positions involve considerations of lots of other more complex strategic points such as weaknesses, exchanges, Lion safety etc. All these points come together to shape our long or rather short term plans.
The structure of this section will also follow the building blocks of strategic evaluation: first we will try to explore the nature of pieces to gain some insight about their values and ideal squares for them. We’ll try to discover what pair of pieces function together well and how. Finally we will take a look at one of the core strategic plans in Dobutsu with some concrete examples: Zugzwang.
b) Material Values and Nature of Pieces
First things first, we need to keep in mind that the value of pieces are fluid. They are constantly changing throughout the game. A value is eventually based on the factors such as their mobility and functionality in that particular position. When positions change, what the position requires changes as well, so the importance of roles changes as well. A function of a certain piece that was very useful in a particular position might turn into a disadvantageous placement of that piece in the next position. Therefore I refrain from numerical judgement of their value like Chick=1, Elephant=2, Giraffe=3 etc. As each piece has its own weakness and strong sides and their relative value depends heavily on the context.
b1) Chick

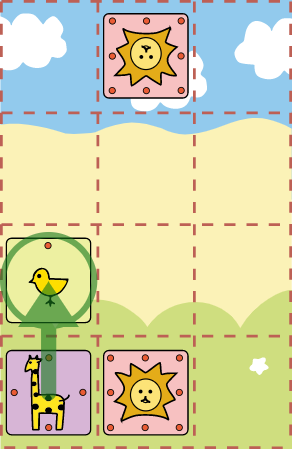
Based on the mobility, chick might seem as the least valuable piece in the game. They can only go forward. Chicks don’t go backwards! So one needs to be mindful before pushing them. On %99 of cases, it is useless to drop them to the last rank, as they cannot move to anywhere from there. (%1 is for a very very special zugzwang position) When chicks are placed in front of their army, they can be good for defensive measures such as building a protective barrier:
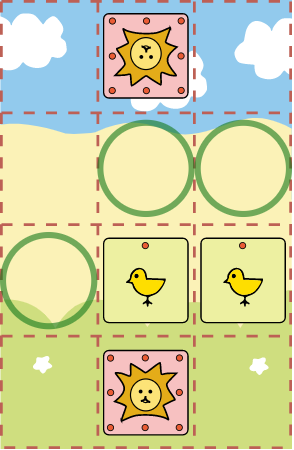
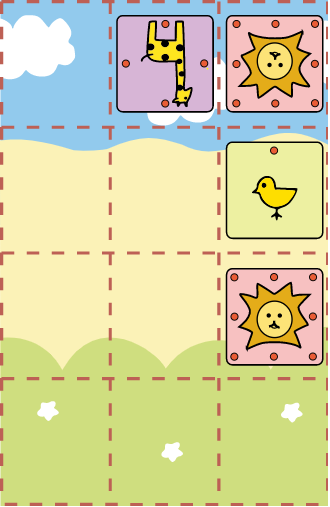
Here Chicks are controlling b3 and c3 squares, so generally this would prevent the opponents from moving a relatively more valuable piece such as Giraffe or Elephant into those squares, unless the opponent wants to exchange that piece for a chick as a part of a concrete plan. Chicks placed side by side like this combined with another piece e.g. on a-file, would serve well as a protective barrier:
In the diagram above, Sente’s Giraffe will go back and forth between a3-a4 and the Lion will shuffle between b4-c4. Gote here cannot break through the barrier of chicks without trading one of his pieces (E,E,G) for a chick.
However we also need to take note of their weak points such as backrank or squares on their right/left. So one needs to be aware of danger of backrank checkmates as the following diagram shows:
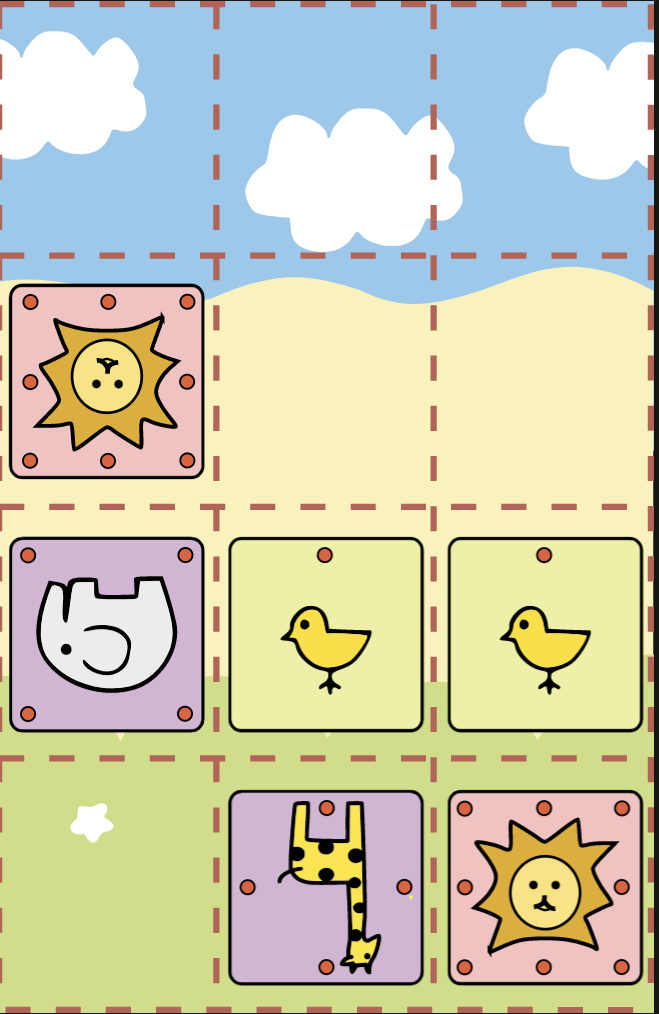
A chick in front of their own army can sometimes block its colleagues and can disrupt coordination of pieces. Since chicks can only go forward, they usually need the support of their friends, such as controlling the square that a chick wants to go so that it is not captured when it gets there. But since the mobility of the piece behind the chick gets restricted, it becomes harder to use these pieces effectively (for example to come to support a chick to advance forward):
(D23/D24) Here the chick heavily restricts the mobility of their friends.
Regarding defence, It is not uncommon to use a chick as a resource against a Campmate (usually in one of the corners in the first rank):

Don’t underestimate the power of chicks in attack! In our examples we have seen them playing in different roles, such as sacrifices etc. But moreover, as an attacking piece, we already know that they are capable of delivering a checkmate. For example:
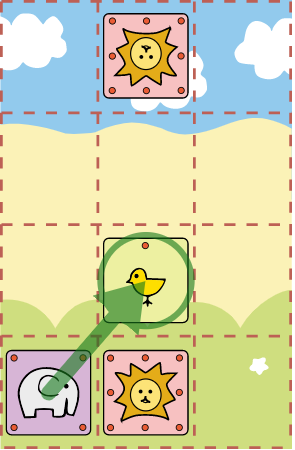
A chick is good at supporting its friends when it is placed behind them. Especially from second rank, a chick can be used to build a solid base point for attacking forces:
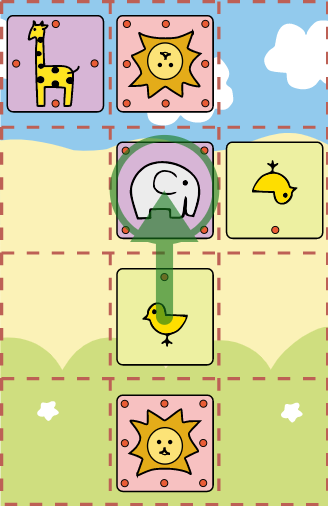
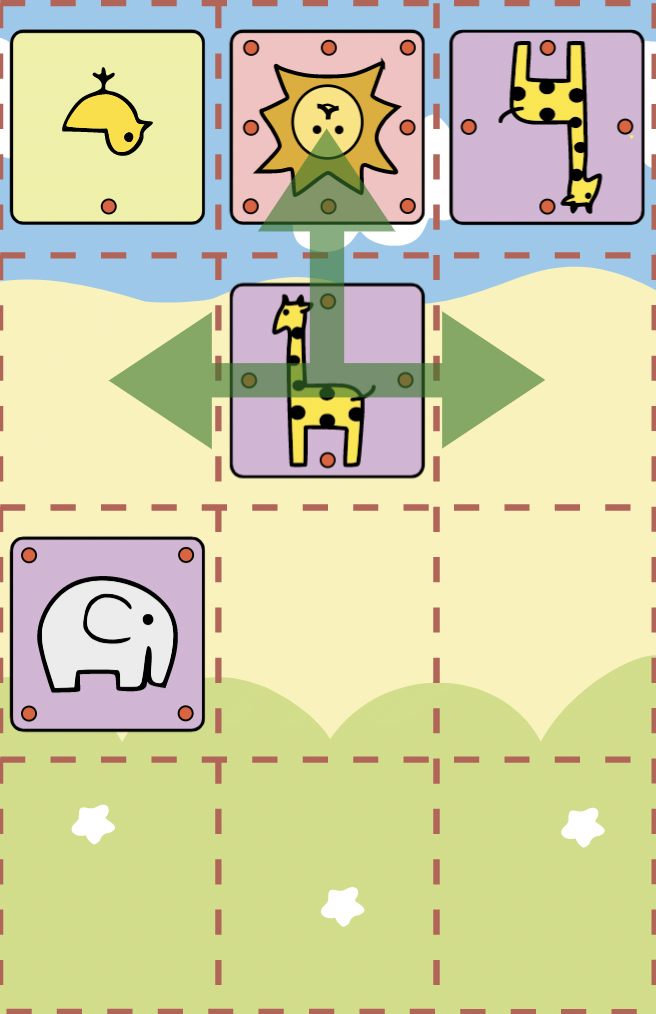
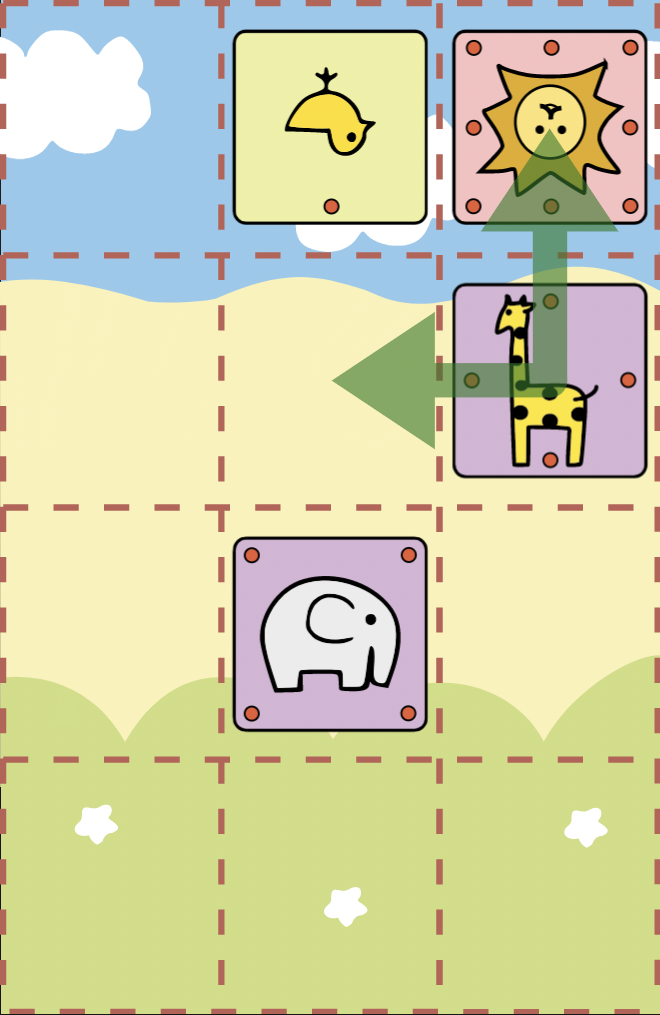
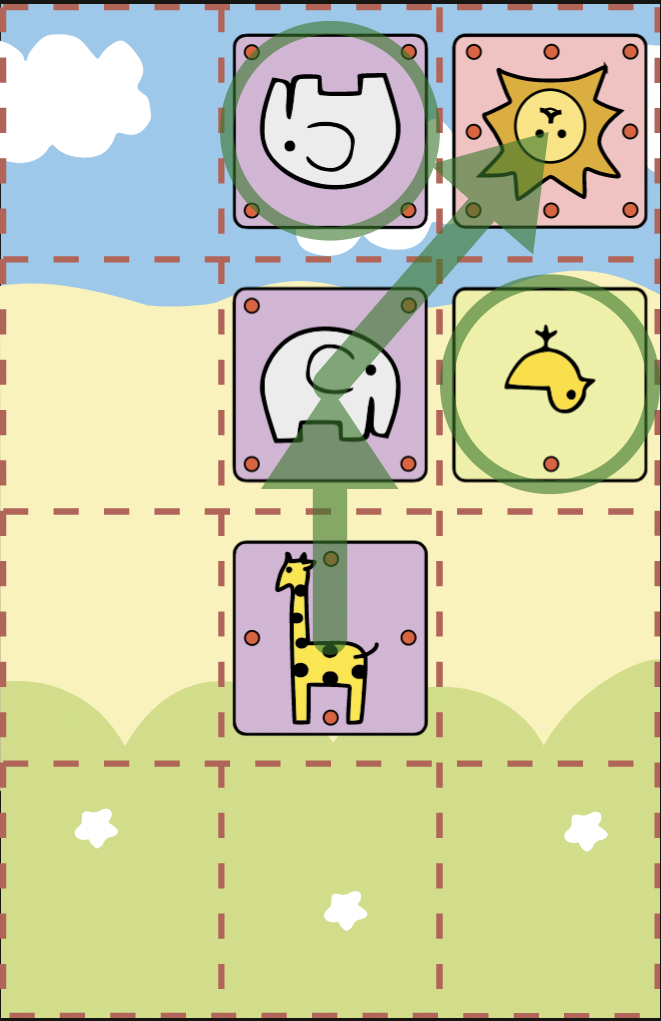
One of the most powerful duo in general is probably the cooperation between a chick and a giraffe, when the Giraffe is standing in front of the chick. This duo is unique as it is the only pair of different kind of pieces that protect each other mutually:
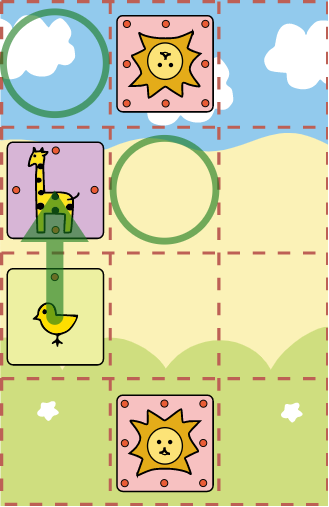
Due to the movement of pieces, for other pair combinations such as Elephant+Chick and Giraffe+Elephant simultaneous mutual protection is not possible. So the main strength of the G+C pair like in the diagram lies in the mutual protection.
We shouldn’t forget that they do have a potential to become Chicken, when a chick reaches the final rank:

The chicken is the most powerful piece in the game (Except Lion ofc), as its movement is a combination of the Giraffe plus half of the Elephant. The Chicken basically moves in any direction except diagonally backwards. However, in practice an opportunity to promote a chick into a chicken occurs relatively rarely and in most of the cases the chicken gets captured instantly after the promotion, so it is rare that a chicken stays on the board for a long time. This is one of the reasons why we have seen not so much of the chicken in our examples, when we were dealing with tactics in the previous section. In those examples, a chicken played a role mainly in promoting with a check to force a recapture and save a tempo.
If the chicken somehow manages to stay on the board for a while without being captured, it is a very strong attacking piece. It is even rare to see a chicken in the defence, as they cannot be dropped, so the only way for them to come back to defense (like to second or first rank) would be to move directly backwards, which would take quite some time.
b2) Elephant and Giraffe


Elephants and Giraffe make a great pair as they complete each other's movements or with other words, they cover different squares. We have seen this couple in action many times in our examples in the previous section about tactics. But we have also had quite a handful number of examples with two Elephants vs two Giraffes. Two Giraffes together outshine in being independent as they can protect each other, while Two Elephants can complete each other, when they are not placed on the same “color complex”.
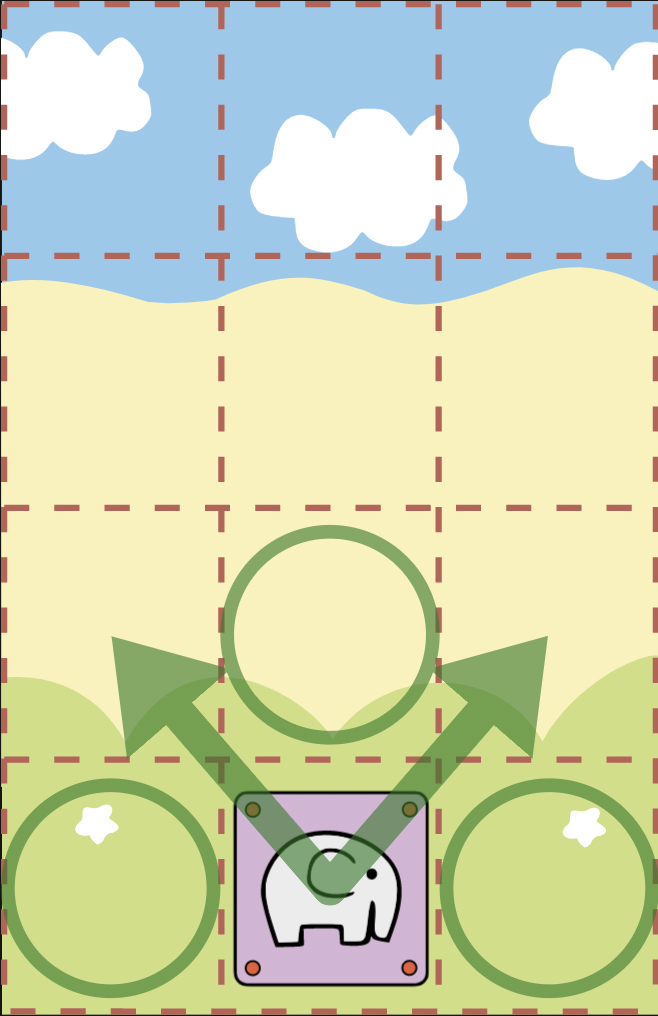
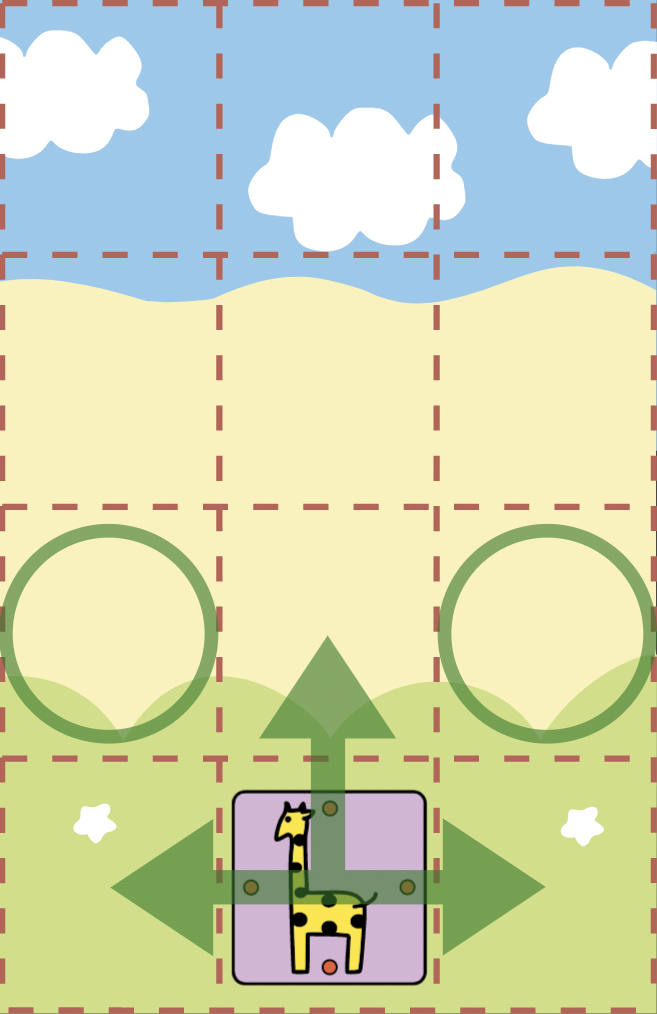
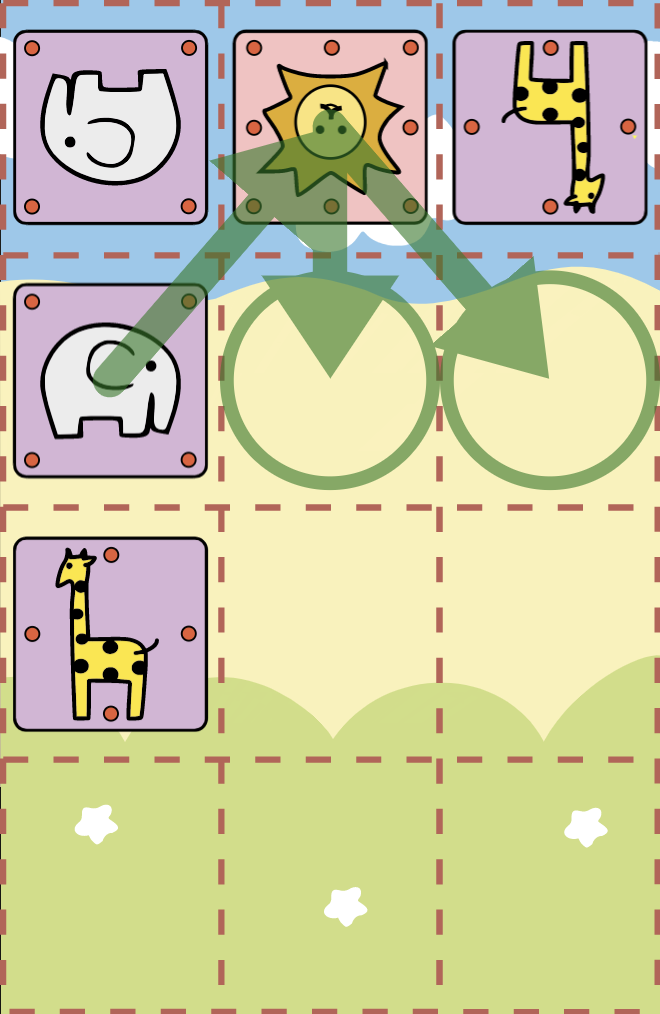
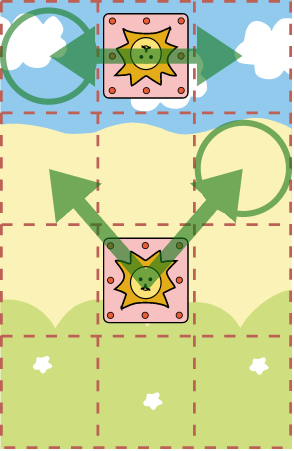
In general, an Elephant is relatively less powerful or valuable than a Giraffe. Even though theoretically they both can go to 4 directions (up/down/right/left for Giraffe and diagonals for Elephant), on an empty board, Giraffe can go to all squares on the board (12 squares), while Elephant would be able to travel only half of the board at most (6 squares):
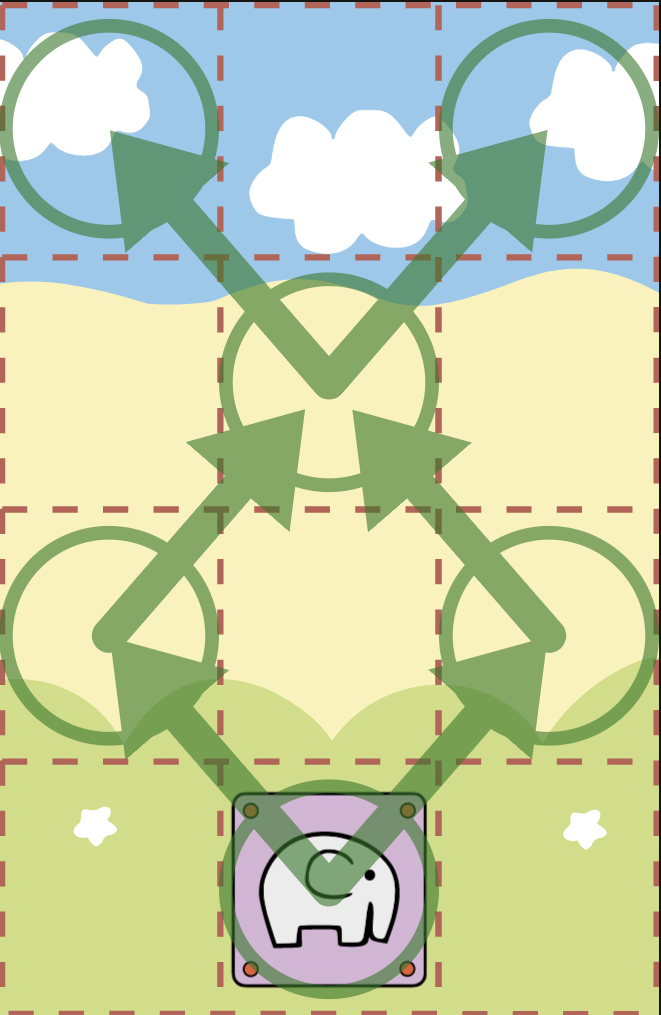
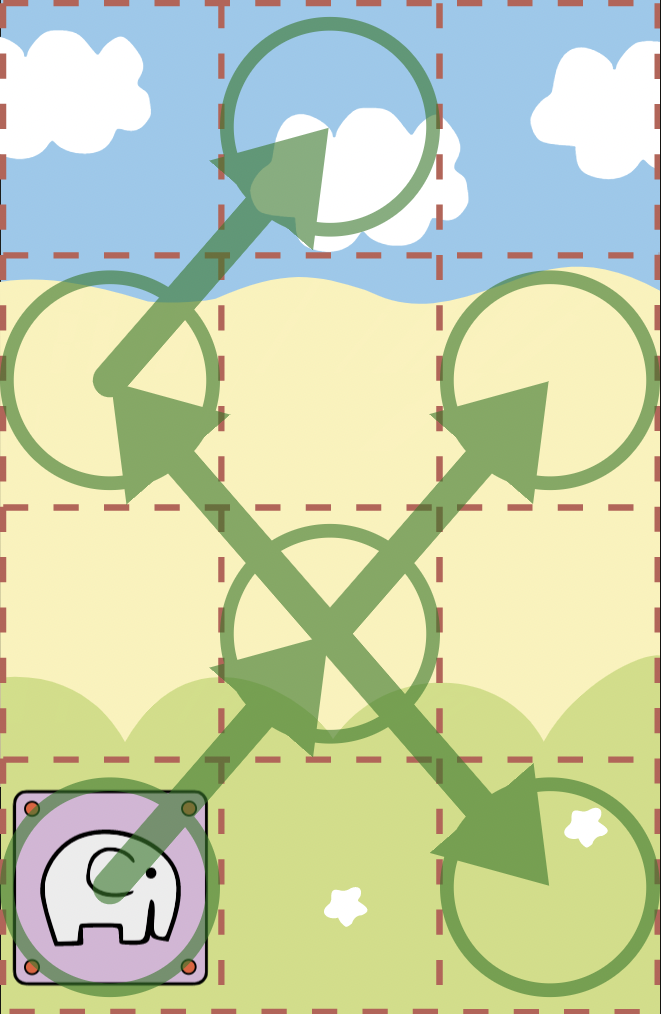

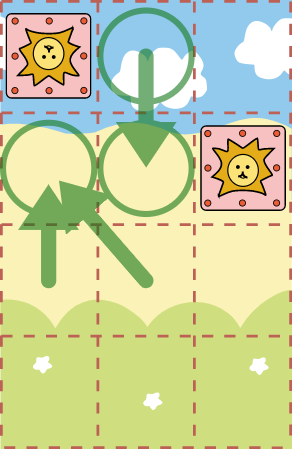
If we visualize the board checkered, an Elephant is always limited to a certain color complex, this means its movements are somewhat more restricted and less mobile than a Giraffe in theory. For example in the corner a Giraffe can go to two squares, while an Elephant has only one square to go from there. Also in the middle of the first rank, a Giraffe controls three squares (two squares from first rank and one from the second rank) while an Elephant only two and these are on the second rank. This means an Elephant in the first rank is in general much less effective defensive resource against a campmate as it leaves holes in the defense:
(D32/D33) We can see here that Giraffe is much more effective in covering campmate squares.
Even two Elephants might not be enough to fight against a Campmate threat, if they are on the same “color complex”. Remember the last example from the previous section (link to fancy example of #5).
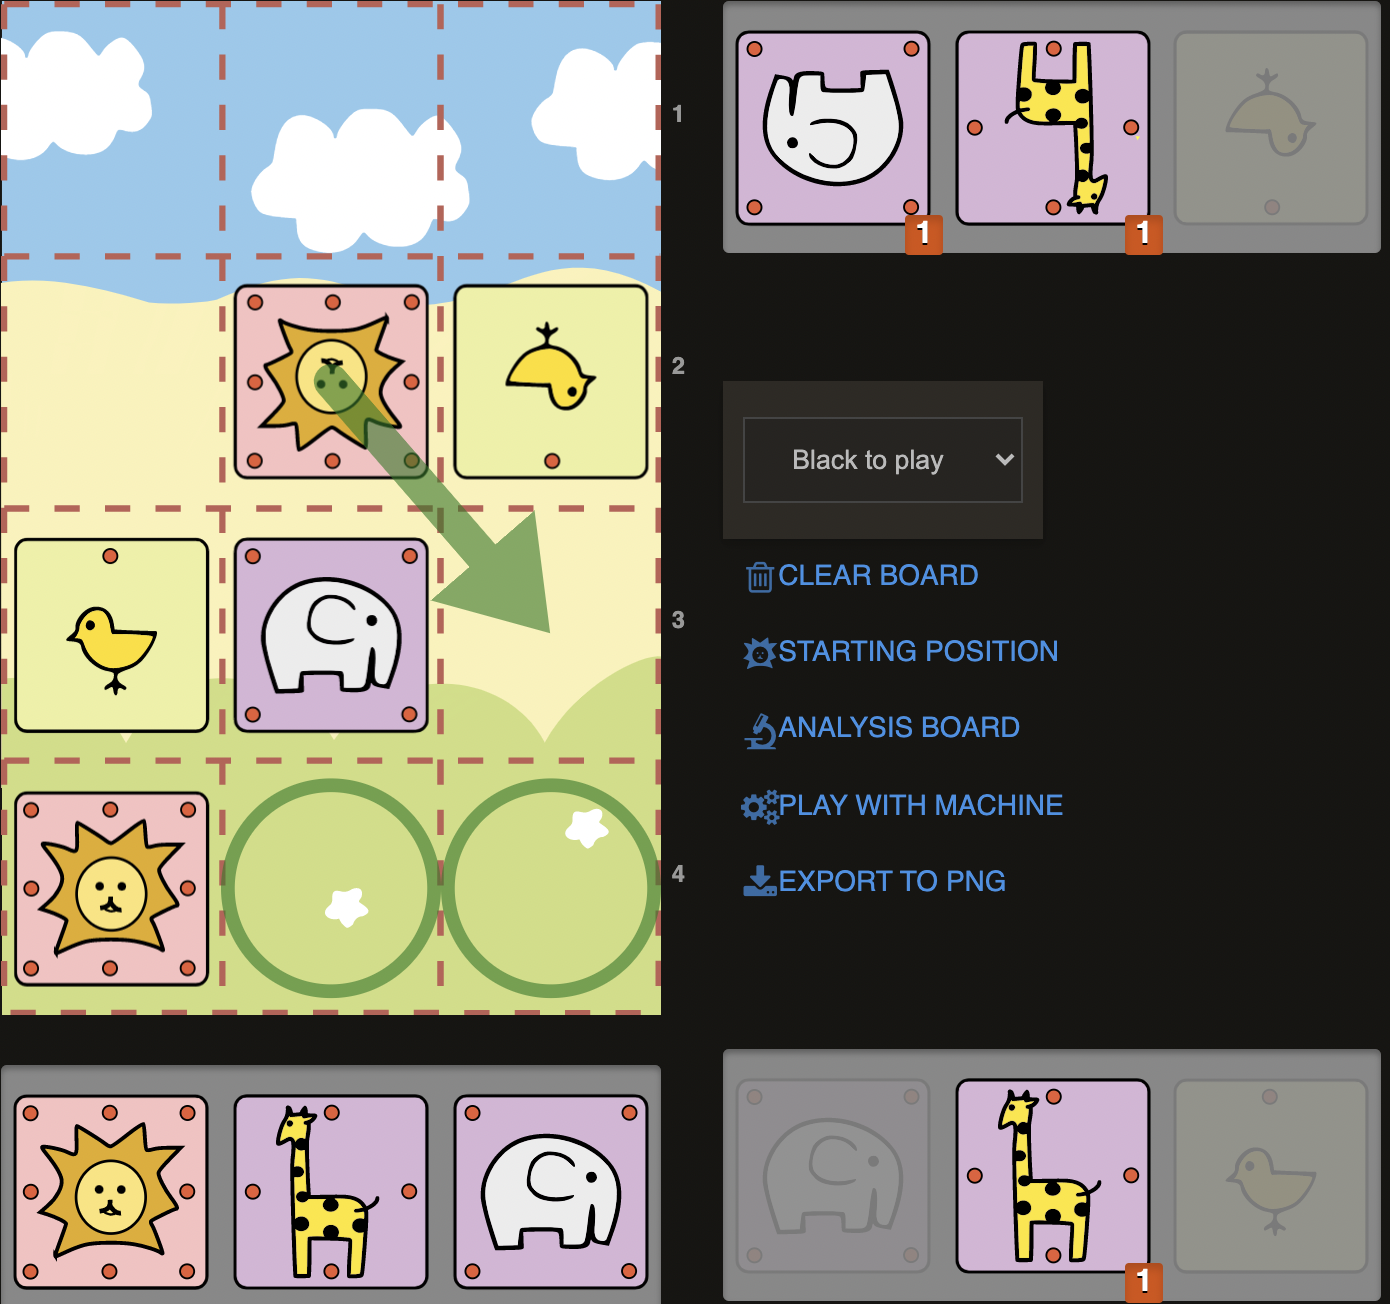
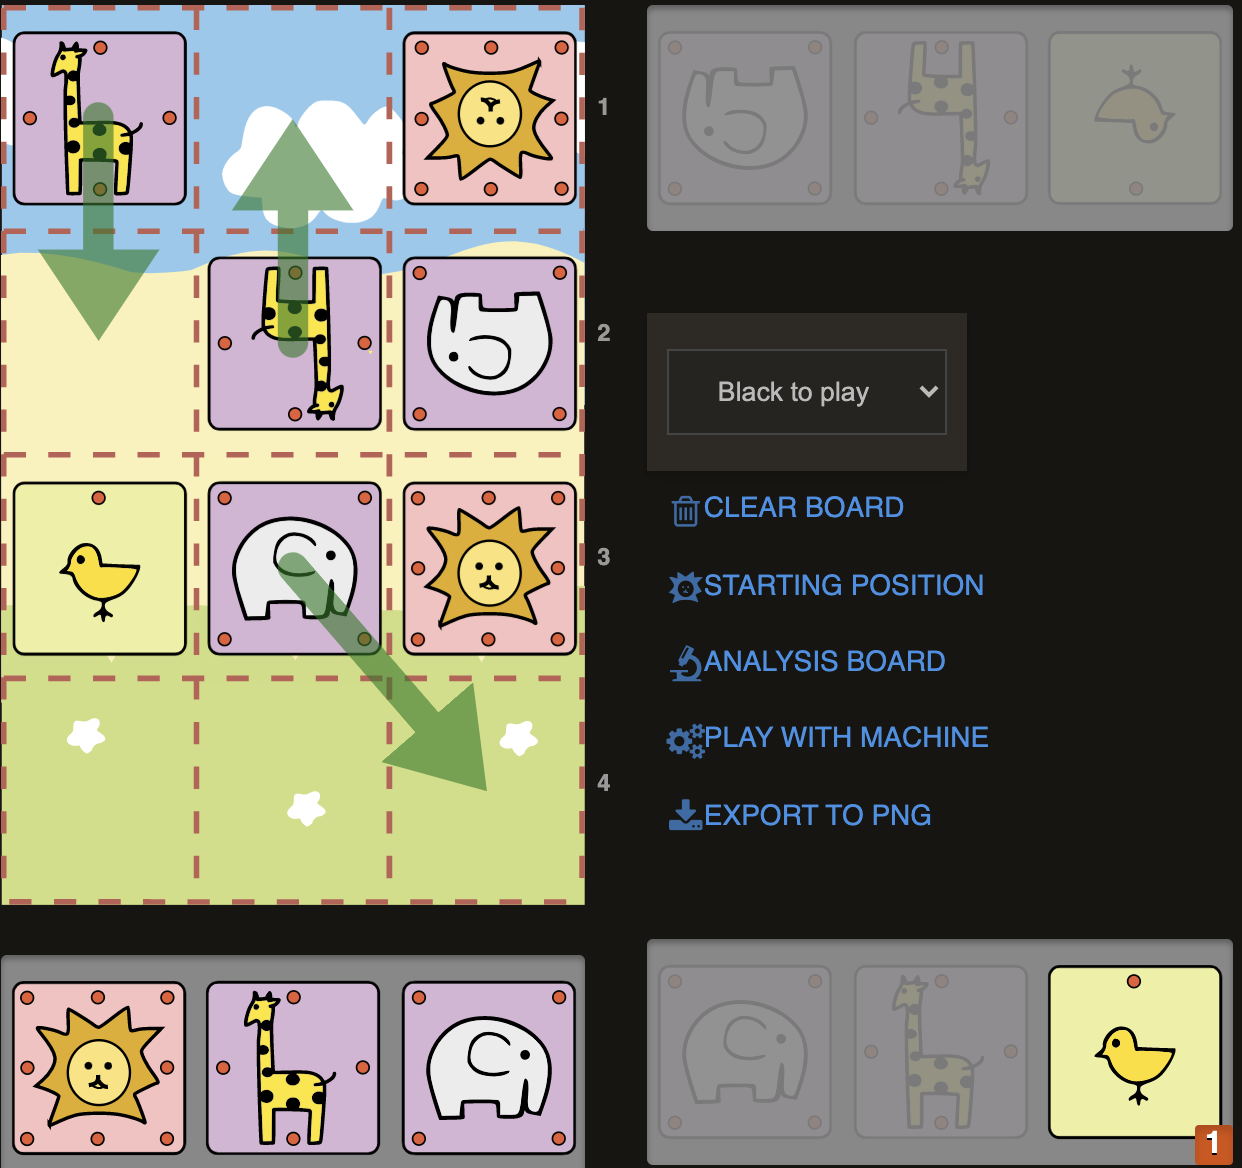
Considering these differences in mobilities, in general a pair of Elephant+Giraffe is mostly used in a formation, where Elephant is the supporting piece and the Giraffe is the scorer:

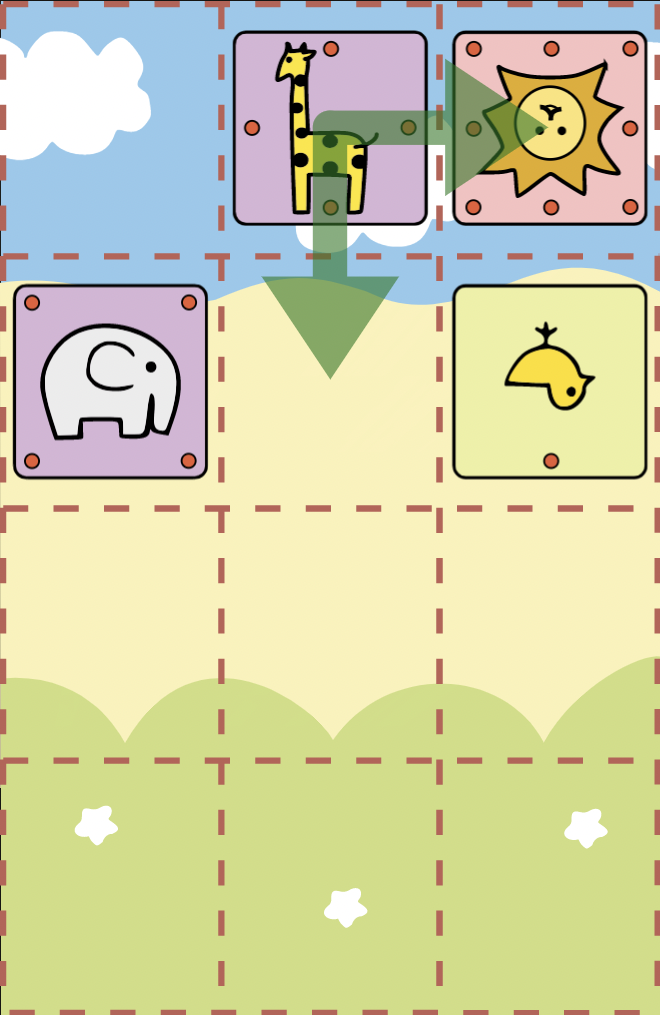
In the Diagrams above, we can see some examples that show that a Giraffe is very effective in delivering checkmates. If we would try to set up similar kind of checkmates by reversing their roles (Giraffe supporting the Elephant),it would be need a bit more work and help:
In general, Elephants are therefore ideally placed on the second rank and preferably in the middle like (b2), from there they can support a Giraffe on the third rank. But this is however very general advice, so what the best formation is depends eventually on the concrete position.
b3) Lion

Self-evidently, Lion is the most precious piece in the game as its capture ends the game. It is also the most mobile piece in the game, as its movements are the sum of the Giraffe and Elephants movement. Nevertheless, Lions feel very insecure in the corners as they are prone to get checkmated like we have seen many times. Since the game can end not only with a checkmate but also with a campmate, this gives Lion additional power to finish the game. For that matter, the topic of Lion Opposition becomes relevant:
In the diagram above, the Lion on second rank is optimally placed and totally dominating the other Lion. From b2, the Lion can support a piece on third rank to deliver a checkmate at the same time the Lion is ready to breakthrough into enemy camp to give a Campmate at the first opportunity. This is an ideal placement for setting up double-threat as we have seen in our examples. For campmate, we’d need to break the opposition by The Lion deflecting aside (a4 or c4) with either with a drop on a4/c4 or on third rank with check (e.g. G@b3+/E@a3+/E@c3+ etc.) and simply march forward with the Lion to the opposite corner, depending where the enemy lion goes after the check:
Once the Lion reaches to third rank, the threat of Campmate becomes very dangerous. We have seen some possible defensive attempts in such cases like G@b4 or E@b3. After that we should look for ways to deflect the defender or separate the Lion from the piece that guards the last rank so we can capture it with our Lion.

c) Zugzwang and other strategic considerations
If we consider the fact that only 4 out of 12 squares are unoccupied in the starting position, it is likely that one side sooner or later might fall into zugzwang due to lack of space for the pieces. Dobutsu Shogi is after all a small world. Therefore Zugzwangs are definitely one of the main strategic weapons in the game. Result of a zugzwang can range from a minor or heavy material loss to Checkmate/Campmate.
In the first section (Link to intro- on the nature of the game) we have even said that starting position is actually a zugzwang and the game is a win for the second player with the perfect play. In practice however, human play is usually far from perfect, so this advantage is often lost after a couple of moves into the game. We then as Gote often need to look for either regain our status of player with advantage or if we are Sente, we should try to punish Gote for the imprecise play. One of the main strategic plans is trying to put the opponent into zugzwang.
All kinds of zugzwang positions can occur but compared to Giraffes, Elephants are by their nature are more prone to get zugzwanged:

The Diagram shows a total domination of the Elephant on b2 over the Elephant on b4. It is taking all the squares (a3/c3) from that enemy Elephant. These types of Elephant vs Elephant situations are common. Let’s see an example:
In the diagram above, last move by Sente was Lb3 threatening Lc2 next. Gote seems to be in a cramped position, as finding a piece and to make a sensible move without losing anything is hard: If the chick moves, then simply G@a2+, followed by Gxb2+ and mate next with a C@. If Lion moves, Lb1, then our backrank checkmate idea would work here with: E@c2+ followed by G@b1# next. Moves like Elephant seem also not so promising: 1.Ea3 Lc2! 2.G@b1 only move (Eb2 back is met with G@b1# - Backrank!) then Sente has a good zugzwang move: 2..G@b3! Now Elephant cannot go anywhere: 3.Eb2 (3. Eb4 Gxb4 simply.) 3..Gxb2! The usual campmating tactic with the idea if 4.Gxb2 Lc1# and if Gote doesn’t take the Giraffe, Sente will take Gxb2+ and Lc1# next anyway.
Giraffe drops are also not a big help: 1.G@a3+ simply leads to a Self-Mate after 1...Lc2 and there is no way to stop 2...G@b1#. So most sensible moves are maybe dropping the Giraffe on the first rank: 1. G@c1 to prevent Lc2. But this time, Sente can simply cramp Gote even further with 1..Cc2! 2.Gb1 and after 2...E@b4! (using our Elephant domination mechanism as above) Gote is in total zugzwang! Now chick cannot leave a2 due to G@a2# threat. Wherever Gote’s Elephant goes, it will simply get captured. Material loss is at this point inevitable and will soon result in victory for Sente.
Let’s look at another example. In the diagram above, it is Gote to move. Exchanging Elephants would help Sente, as it will be grabbed by Giraffe with a check! And this is a very important thing to remember: Keeping the initiative in Dobutsu Shogi is extremely Important! If you have the initiative, you should look for ways to never let it go!
Even generally an exchange is in favour of the attacker, here Sente’s pieces look cramped in the corner and it desperately wants to exchange some pieces to get space. In this case, the plan of Zugzwang is stronger than the principle “Exchanges favour the attacker”. Therefore we just need to retreat with our Elephant calmly to the first rank with a move like 1.Ec1. Now if 1..Gb4, we will again calmly just decline the exchange: 2.Ga3 and put Sente in total zugzwang. Material loss is after 2.Ga3 is inevitable as all the three legal moves are losing a material: 2..Gb3 3.Gxb3 simply (2..Eb2 4.Exb2/2...Ga4 3.Gxa4).
Best try for Sente after 1.Ec1 would be to simply retreat with Elephant as well 1...Eb4 and hope for repetition Eb2 Ec3 Ec1 Eb4 etc. However we have then another way to exploit opponents lack of space: 1.Ec1 Eb4 2.C@b2! now Giraffe has only square to go: 2...Gc3+ and after 3.Lb1, Sente is all cramped again and has to allow exchanging his Giraffe for our chick: 3...Gb3. This material loss leads to loss of game very quickly, for example: 1.Ec1 Eb4 2.C@b2! Gc3+ 3.Lb1 Gb3 4.Cxb3 Lxb3 5.Gxb4+! Lxb4 6.E@a3+ Lb3 7.G@b4+ Lc3 8.Ecb2#.
As we can see, the move 5.Gxb4+ was a good example for the general principle that the “Exchanges favour the attacker”. We need to add a little condition to that principle: “As long as we keep our initiative”.
General rule of thumb says: “Having pieces in hand to drop is very handy and important!”, when you exchange a piece while you are attacking, you get a piece that you can drop at anywhere you want on the board. This gives you usually more effective options than making a move with a piece that is already on the board, because you might want that piece to be completely on another square but it might not be possible to move it there legally etc.
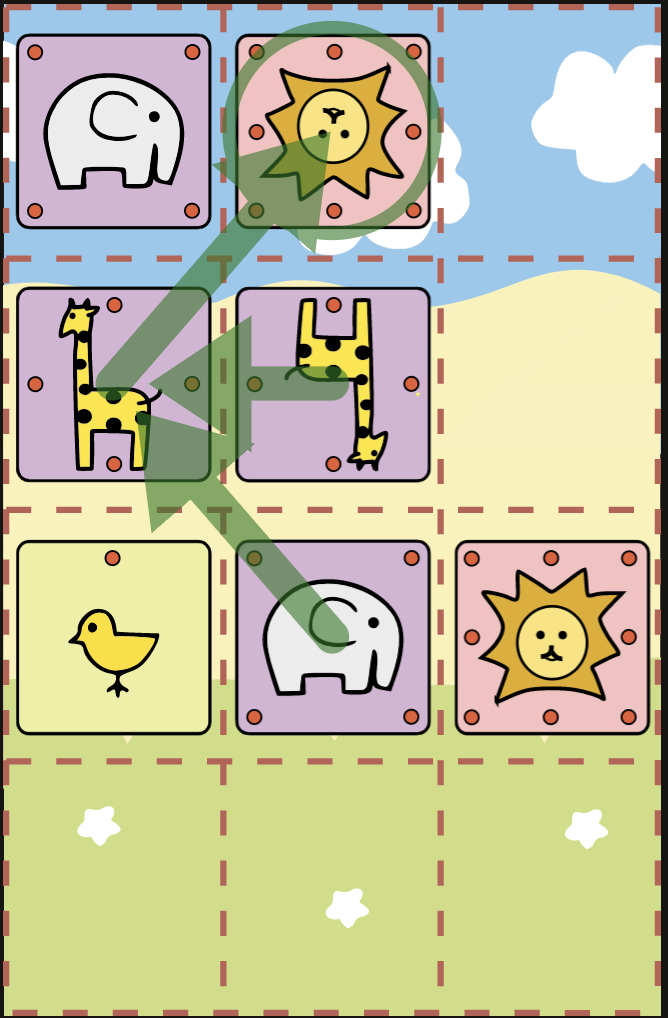
If in the diagram above, Sente is to move then any exchange would favour us: 1...Gxa3 and we recapture with check 2.Exa3+ and after 2...Lc4 simply 3.G@b4# is mate. It is as if our Giraffe suddenly teleported from a3 to b4. 1..Gxb2+ is no help either. After 2. Lxb2 We end up having two Giraffes (one in hand) and with a dominating Lion. Such situations are usually likely to lead to a zugzwang for the side with EE-Pair. As we can see Ga3/Cc2 is a powerful duo, so no distracting drops such as 2...E@c1+ or E@a1+ make any sense. The Lion can simply capture and come back. So if 2..E@b3, we can apply our usual backrank idea once again by exchanging pieces with check: 3.Gxb3+ Exb3 4.E@a3+ and 5.G@b4#. 2..E@c3+ also gives nothing after 3.Lc2 and Sente is in Zugzwangs with those gimpy Elephants and lose one of them in the next move for free.
Another try after 1..Gxb2+ 2.Lxb2 could be 2...E@c4. But with a similar idea to our examples from the Checkmating patterns section, Gote can force a win here with 3.Gxa4+! Lxa4 4.Lc3 (threatening Lxc4#), so now if 4..G@b4 to protect c4, 5.G@a3# is mate (notice how we kept one Giraffe in hand and waited for the best occasion to drop it) if 4..Eb3 then 5.G@b4#. This example combined many of the ideas we have covered so far: Piece Exchange Principles, Checkmate Patterns, Double Threats with Checkmate & Campmate, Zugzwang Idea etc.
Section Summary
Always strive for initiative! Never let it go.
With the condition of keeping the initiative (for example exchanging with check), exchanges favor usually the attacking side, as you get pieces to drop.
Having pieces in hand ready to drop is generally more favourable than having them on board.
Keep the zugzwang idea in mind. Especially when you have GG vs EE. Avoid unnecessary exchanges and soon the opponent will run out of sensible squares and lose material.
Try to maintain a reasonable amount of space for your pieces to shuffle back and forth in case of need or if possible at least try to save a tempo for later (for example dropping a chick on the first rank would give you a couple more moves than on third rank).
Don’t forget that these are general advice but Dobutsu is a very concrete game. What the best plan and move are, depend eventually on the concrete position. A certain position might require complete opposite action of a general advice, so the final decision should be made accordingly with the requirements of the particular position.
Practice, practice, practice! :)
