1. Introduction to Opening Theory
Important Note: If you cannot play out the moves or links are not clickable on this webpage, simply resize your browser to a width less than 1200px, basically until the sidebar disappears, then it should work.
The task of studying Opening Theory in Dobutsu Shogi might be challenging at first. There aren’t any opening books out there yet (as far as i know) and without any classification or without knowing the names of the openings you are trying to study, it might be hard to orientate yourself in the ocean of possible lines. It is very easy to get confused in the openings, because so many openings and lines are constantly transposing to each other and this similarity makes it heavily confusing at first. Sometimes there are very little differences that a line leads to the exactly same looking position from another line but this time it is the other side to move at that particular position etc.
To explore openings in Dobutsu, my first task was to organize and classify openings and name them for myself, which then makes studying a certain opening or line way easier. However my naming/classifying convention was quite mechanical. I did not give any openings a fancy name like in chess openings (Dragon, Fried Liver Attack etc), but simply gave them minimal codes with letters that would imply to me if the line is on the main branch or a sideline etc.
There are also some facts to consider: In the starting position there are only 4 legal moves. Main solution of the game by Fairy-Stockfish suggests that the starting position is Mate in 43, which means with perfect play, it should in theory last at most 43 moves and it is the longest line. This also implies that any other deviations from the line of main solution by Fairy-Stockfish results in quickier win/loss. I took the main solution line as a starting point and tried to find out how to transpose that line from the four possible first moves. All study was done from the perspective of Gote, since it is theoretically the winning side.
After a little bit of examination, I've started to form the opening tree with three main branches and ways to transpose to it. There were also a couple of other lines that did not transpose to the main solution line at some point. I’ve called them sidelines, (in total 5). Other remaining lines that do not transpose to any of the main branches and sideline, i’ve considered highly inferior and put them aside to examine later. At first, i’ve tried to draw out the tree on a paper to visualize it. To mark the branches of three, i simply used letters of A, B,C for the mainlines, and S1,S2,S3,S4,S5 for sidelines.
One important milestone was to discover the intersection point between possible different starting lines with the main solution line. With other words, the discovery of the point of transposition. That exact position position i’ve called it “The Critical Diagram”, which should be the critical position to understand and to know how to play:
I’ve figured out that Gote can try to reach this exact position in many ways, which is theoretically winning and part of the line of the main solution by Fairy-Stockfish. Of course, how to execute that theoretical win is the real deal and it is a task for mainly a computer. Because the ability to force win from here every time would simply mean to know how to refute all of the suboptimal lines and with the inclusion of these suboptimal replies by Sente in each line the opening tree grows exponentially so extreme that it quickly goes beyond the memorization skill of (most) humans.
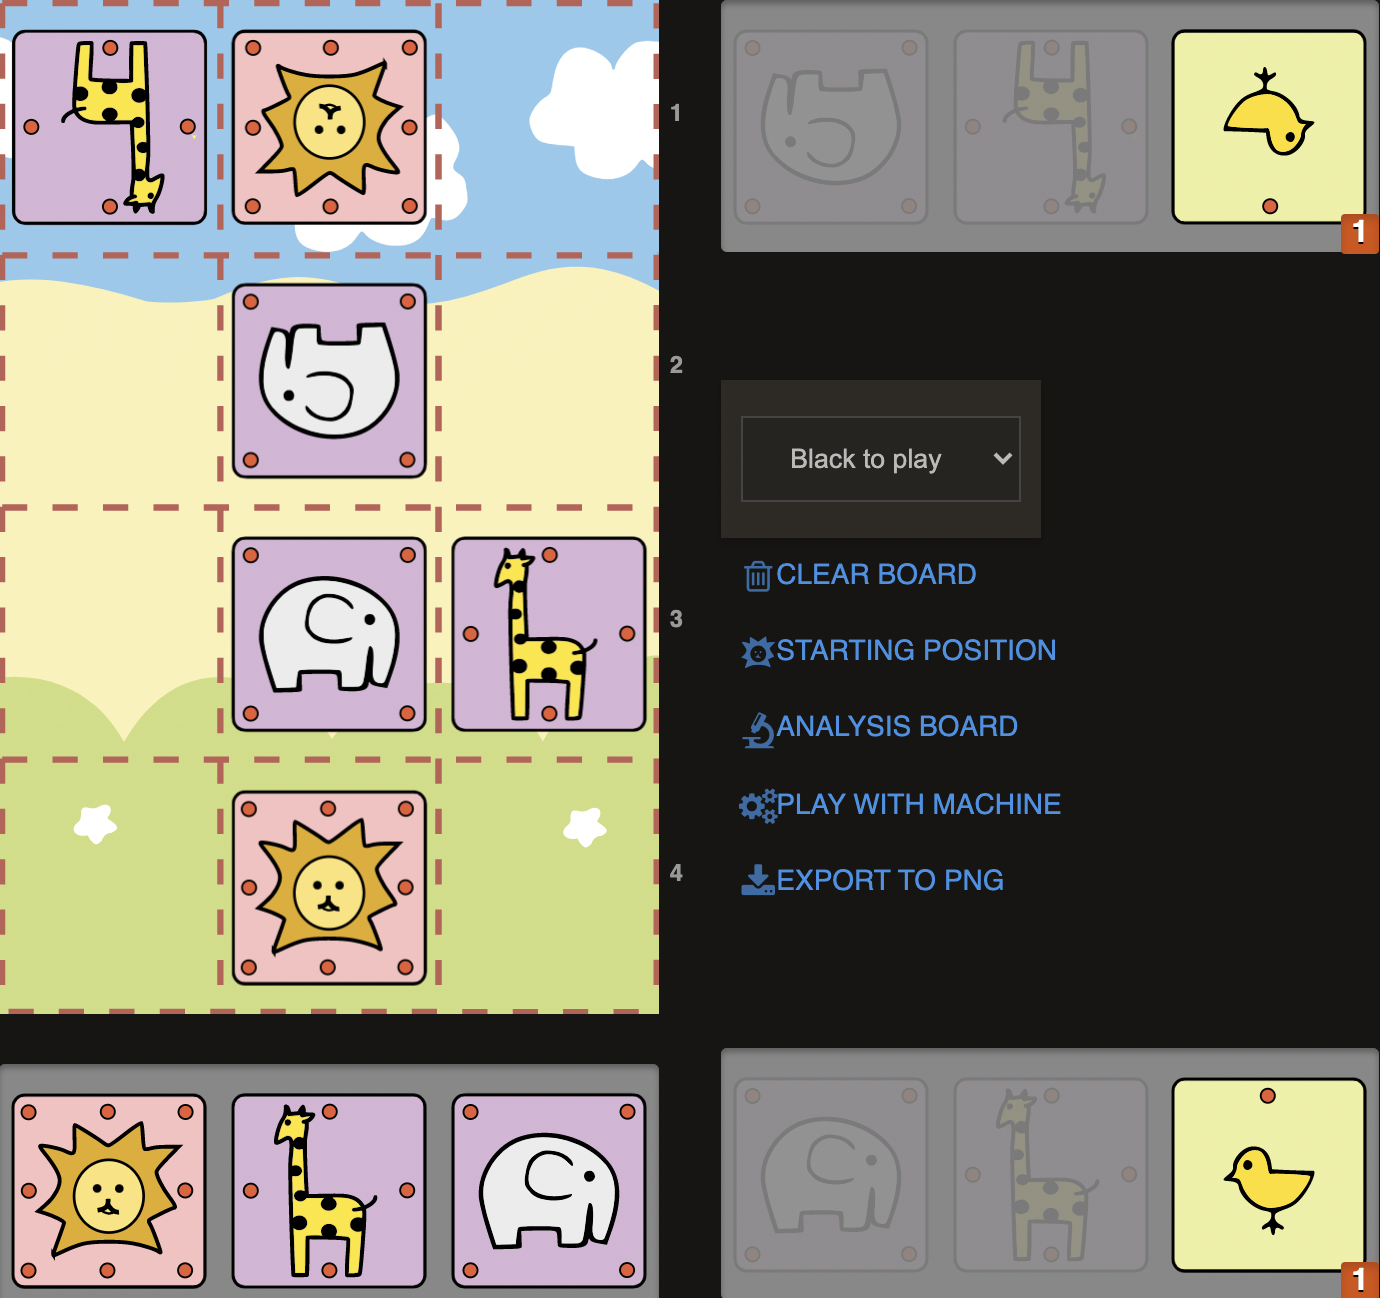
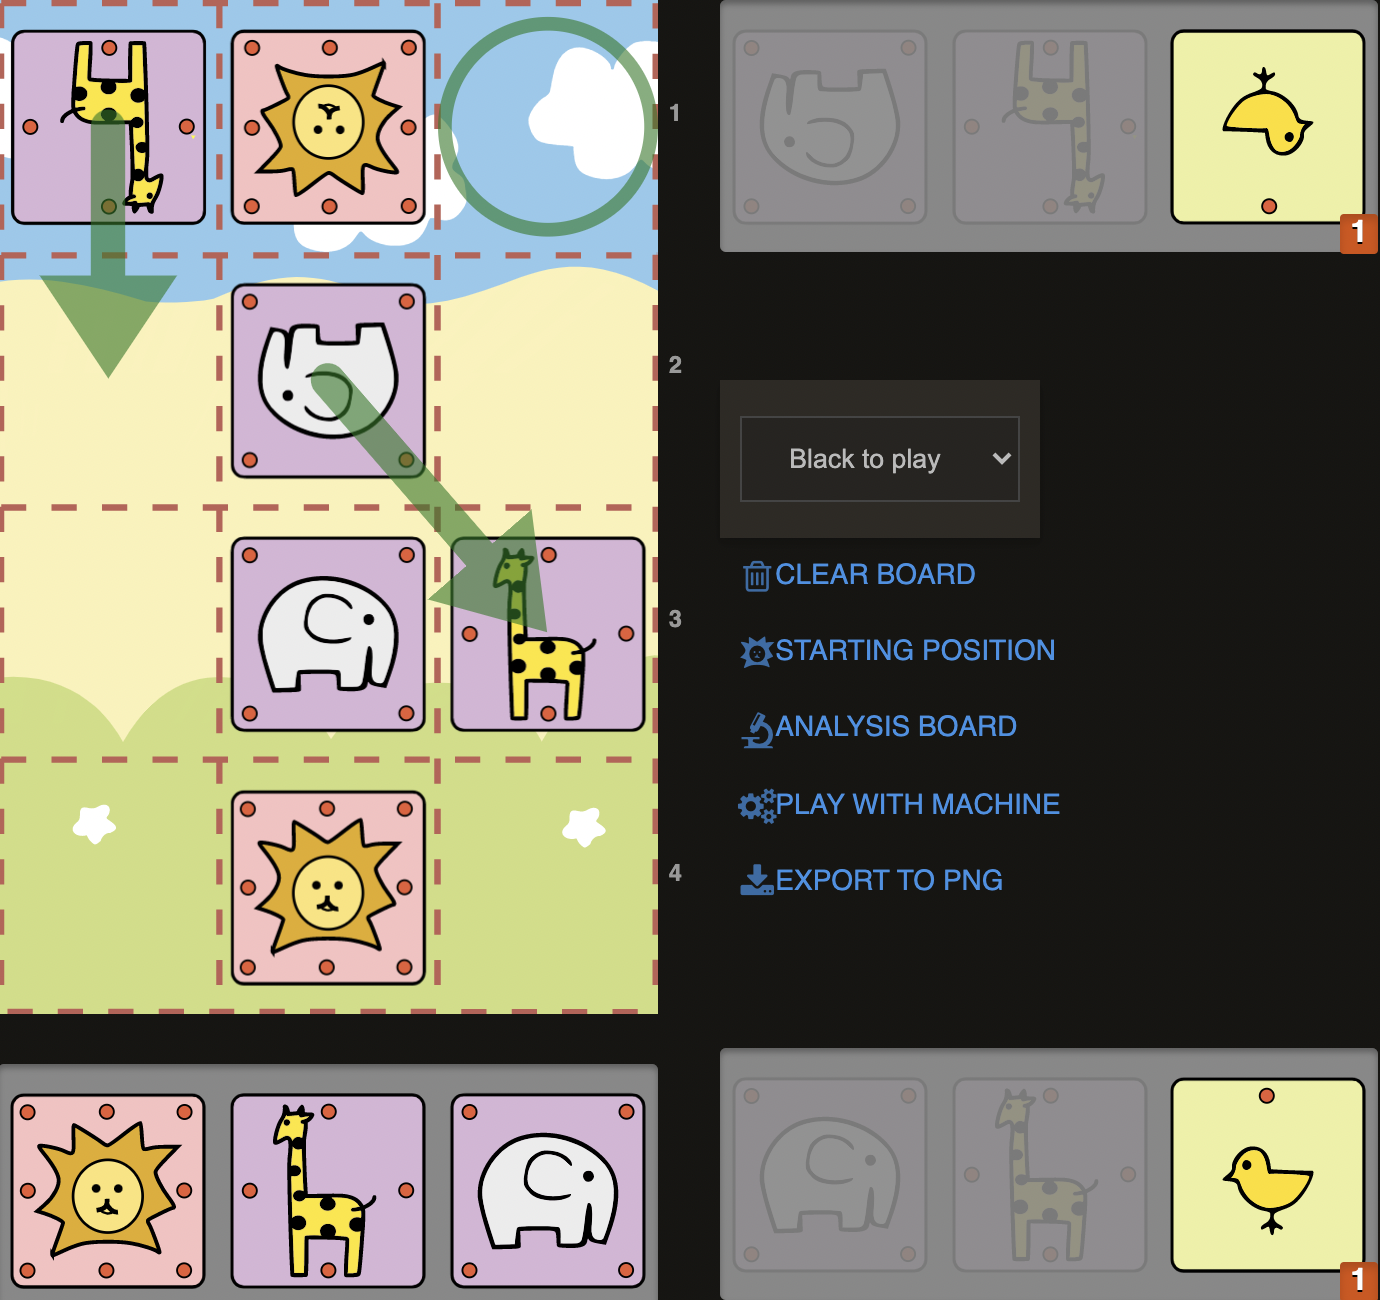
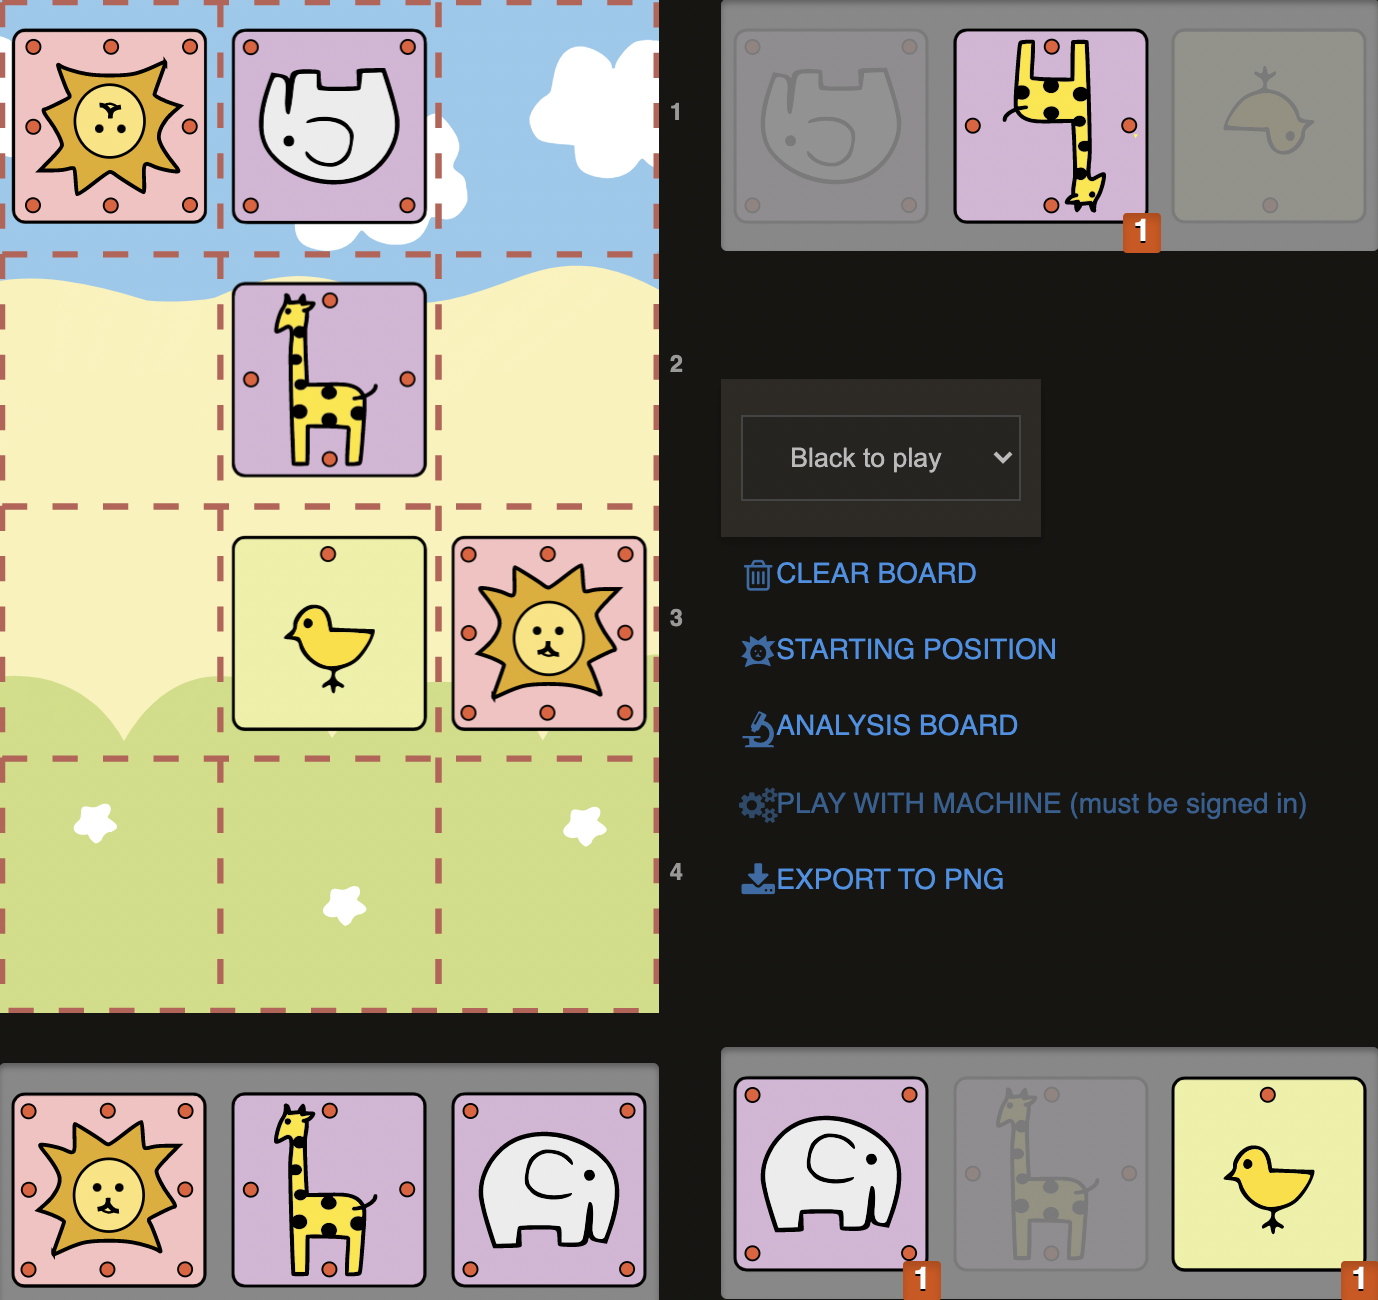
Let’s now look at ways to reach this position as Gote. First and most natural starting move is the chick exchange:
After 1.Cxb2 Exb2, moves other than 1.Eb3 are inferior: 2.Ga3 simply allows an unfavourable early trade of Giraffe 2..Exc3+. A move with Lion like 2.Lb3 ( La3/Lc3 are not legal) is not a serious reply by Sente as it does not improve its position at all. Early Chick drops such as 2. C@b3 lead to zugzwang pretty quickly after 2..Ea1 and 3.Gc2 (with the idea of C@c3 next to capture the Elephant stuck on c4 thanks to chick on b3). So after the natural 2.Eb3 Gote plays 2..Gc2 and we already reached the Critical Diagram.
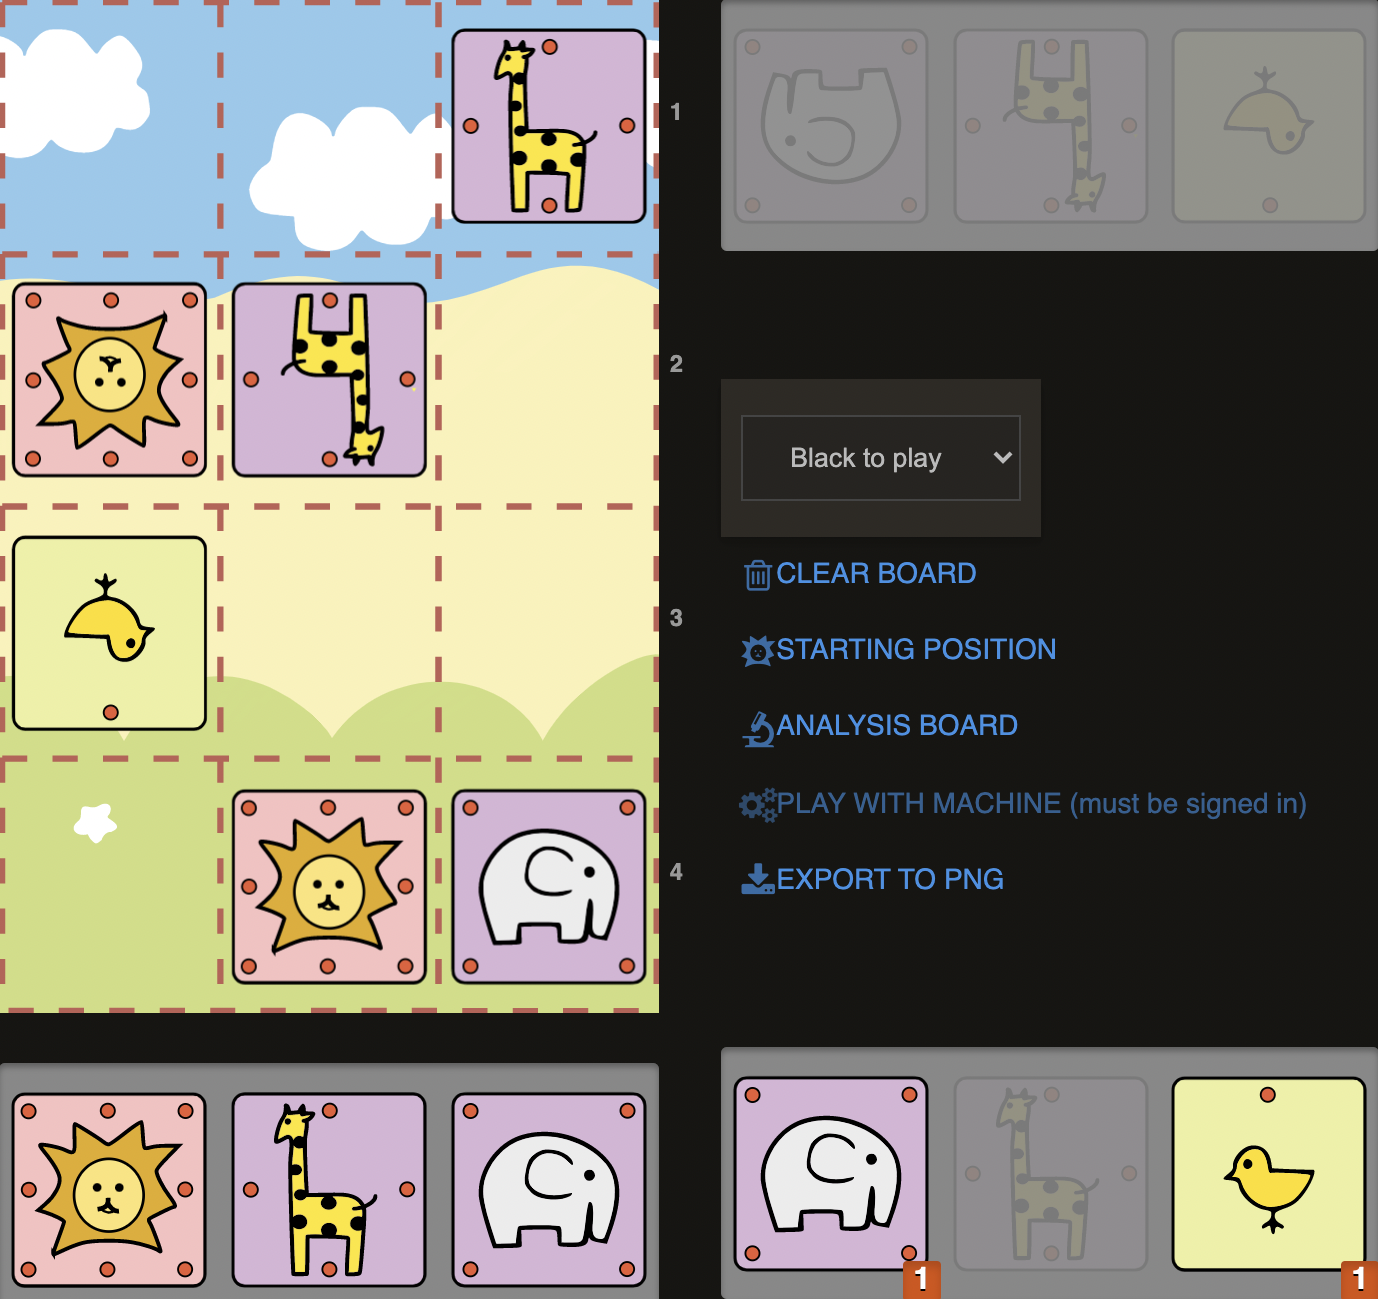
If Sente tries to go Bongcloud on the first move with either 1.La3 or 1.Lc3, here is how we can almost forcefully reach the Critical Diagram:
Basically after 1.Lc3 we simply capture first and then Eb2+. In case of 1.La3, we check first with Giraffe, then capture on b3:
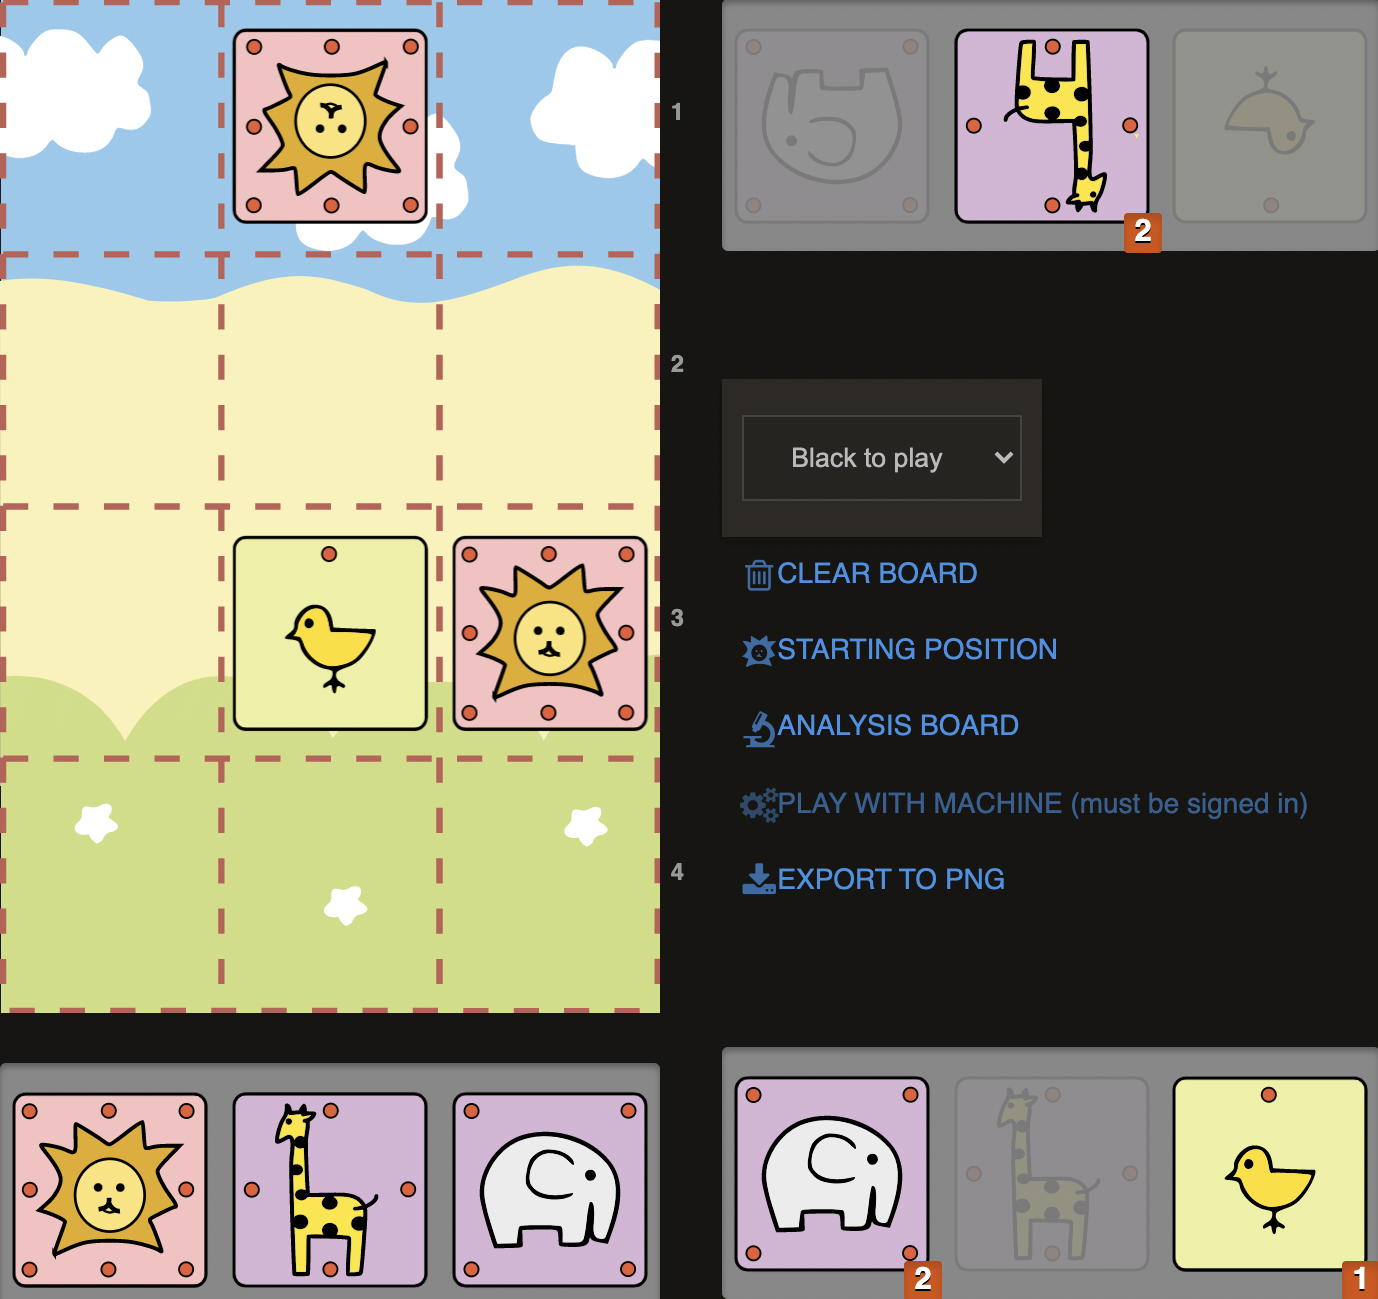
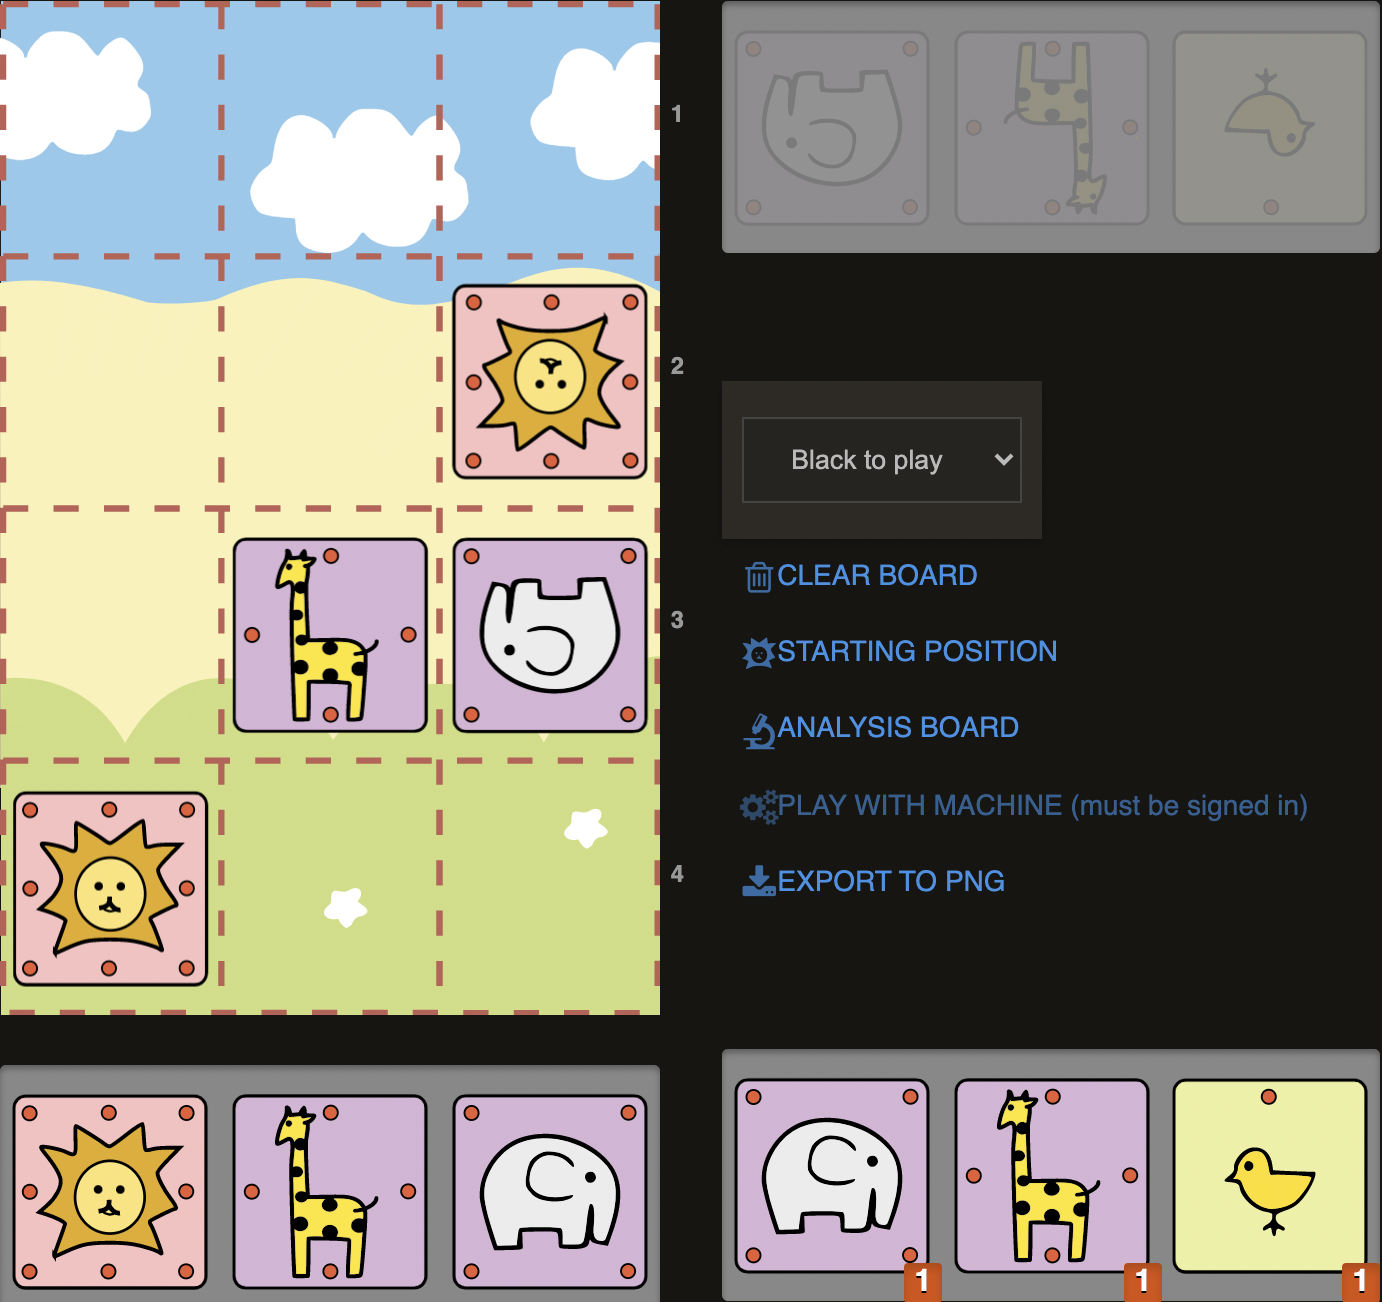
Only legal first move left is 1.Ga3. Sente can try to lose a move or repeat moves with 2.Ga4 back after 1.Ga3 Gc2, but here instead of 2..Gc1 back, we can capture the chick on b3:
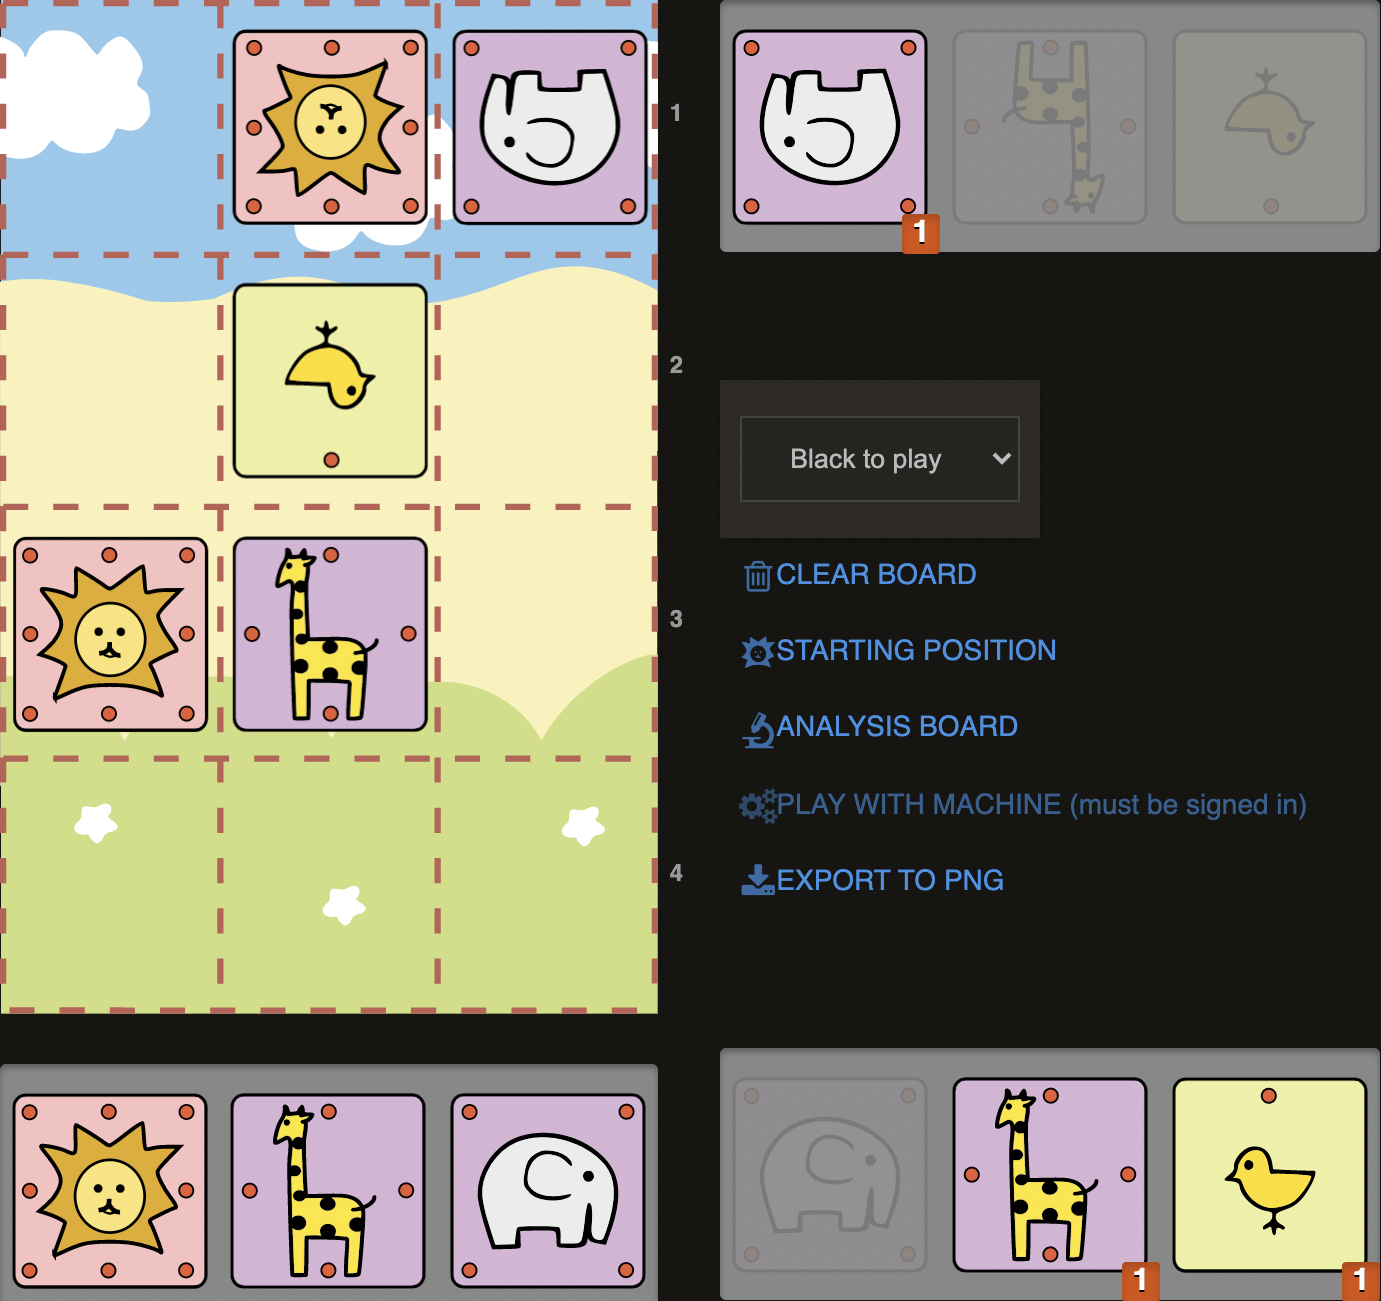
Once again we have reached the Critical Position. We have seen how we as Gote can try to reach the Critical Diagram from the four starting moves. Of course Sente can play a suboptimal line, which i refer to as sidelines, to avoid reaching the Critical Diagram. Among the five sidelines I've examined, most serious ones to consider are lines with 1.Ga3. Sente can capture our chick on second move after 1..Gc2 instead of going back with 2.Ga4:
This line i’ve called S1 (Sideline 1). 3.Gb3 is a very logical move by Sente, to avoid Exa3. 3.Eb3 would however transpose to a position from the main branches. (The Critical Diagram, where Sente plays 3.Ga3 basically)
Sente can try to be more patient and make a waiting move after 1.Ga3 Gc2 2.La4. This line i’ve called S2 (Sideline 2 - Kingside Step):
If you want to know what is the WORST sequence of moves you can play as Gote after 1.Ga3, it is the idea of capturing the chick and dropping it back to where it was. This idea results in the quickest theoretically possible checkmate in Dobutsu Shogi:
Let’s now return to the Critical Diagram and explore it a bit further. There are three main replies by Sente in that position: Ga3, C@c4, Exc2+. I named these three main branches as follows:
A1 for Ga3 (a move in the A-file), B1 for Exc2+ (a move from the B file), C1 for C@c4 (a move in the C-file):
Unfortunately i will not go into details for now, because it would be too much material to mention and would get complicated technically, (showing images and explaining the lines verbally etc) so i postpone this part until Pychess.org implements the study feature. But nevertheless I want to briefly comment on each main line and afterwards I'll show some example games played in these lines to give some ideas about it.
In A1), for example after 1.Cxb2+ Exb2 2.Eb3 Gc2 3.Ga3 (A1), best move as Gote is to capture the Giraffe with 3..Exa3+ 4.Lxa4 and now simply avoid trading the Giraffe with 4...Gb2. As Gote you then end up with two Giraffes, one in hand along with a chick. Main strategy is then to play for a zugzwang since two Elephants are more prone to get zugzwanged if you remember our examples.
In B1), for example after 1.Cxb2+ Exb2 2.Eb3 Gc2 3.Exc2+ Lxc2 you as Gote basically strive to this reach Chick structure:
An example to reach this structure could be: 1.Cxb2+ Exb2 2.Eb3 Gc2 3.Exc2+ Lxc2 4. C@c2+ Lb1 5.G@b3 E@a2 6.Gaa3 Exb3 7.Gxb3 C@a2 (we’ll see more of this in an example game later.) But for now, keep in mind that idea with this chick structure is to put/have an Elephant on b2 to have extra control over a3 square. Lions are usually at the first/lank rank, there is always a potential for a backrank mate with Ea3+/G@b4# like we’ve had in our examples D)1 and D)45. Also the chick on c3 is simply blocking the way out for Lion on c4. In this chick structure, one should not hurry to drop the Giraffe back on the board, then later wait for best occasion to drop the Giraffe either on a3 like in D)45 or to drop on the last rank depending where the Lion goes: G@a4 if Lc4 and G@c4 if La4. Then simply try to execute the zugzwang strategy as in D)44.
C1), for example after 1.Cxb2+ Exb2 2.Eb3 Gc2 3.C@c4, is the main line in the main solution of Fairy-Stockfish. If you know how to play as Sente, you can put the most tenacious defence in this line. However this is a very complex line (main moves goes like: 3.C@c4 C@c3 4.Ga3 Cxc4.C+ 5.Exc4 Exa3+ 6.Lxa3 and Gb2) so i’ll save this for another time.
Now that we have an idea about what the main lines and sidelines are, let’s see a couple of example games that I've played as Gote against Fairy-Stockfish Level 8. These games demonstrate some of the core ideas in these opening lines. If you look carefully, i’m pretty sure that in these games you’ll recognize some of the patterns and the ideas we have covered so far in previous sections.
2. Example Games against Fairy-Stockfish Level 8
Game 1
This is an example game for the line of B1, after 7.C@c3, we reach the chick structure from D)48. One can also recognize the zugzwang idea with 8.G@a4 from D)45 in the game 1.
Game 2
Very similar to Game 1, once again B1 line with same chick structure and Zugzwang idea ( 8.G@a4) from D)45.
Game 3
Although in Game 3 the opening line played is A1 line, but still Gote manages to the chick structure. Afterwards Gote tries to place pieces optimally (for example 11...E@b2) to reach a similar position as in the previous games.
Game 4
This game (Game 4) is an example for Sideline 2 (S2) with Kingside Step. Gote once again manages to get that the chick structure even though in each game, how this structure was reached was different. In this game, after 6..Exc3, Sente drop chick on c3 as a zwischenzug (7.C@c3+), to not let Gote occupy that square: for example if 7.Gxa3 directly, then 7..G@c3+ followed by 7.Lb4 E@b3 and the idea of Gc4# is too strong. If Sente tries to deal with checkmate with 8.Ga2 then Gote switches to Campmate idea with: 8...Gc4+ 9.Lc3! with the idea of Gb4-Lc4# next.
Finally let’s look at two games in the line B1 without the chick structure:
Game 5
Game 6
3. Puzzles and Exercises
Feel free to test and train yourself with these exercises below!
Exercise 1
Full Solution: 1.Cb3+ La3 2.Lc3 G@b4 3.Cxb4 any move 4.Lc4#
Exercise 2
Alternatively, you could go for a faster way: 1.C@a3+ Exa3 2.Lc3 G@b4 3.Gxb4+ Exb4 4.Lc4# Campmate
Bonus Points if you also spotted:
1.Gxb4+ Lxb4 2.Cb3 La3 3.E@b2+ La2 4.E@b1#
Exercise 3
Exercise 4
Exercise 5
Full Solution is: 1.C@c3! E@b1 (1...Lxc3 {1...Cxb2 2.Cxc4.C+ Lxc4 3.E@b3+ and 4.G@c4#} 2.La3 and 3.La4# Campmate next ) 2.Gxb1 Cb2 3.Cxc4.c+ Lxc4 4.La3/5.La4# or 4.E@b3+/5.G@c4#